Wrapping information in a symbol-Microsoft Tag
Microsoft TAG
Created By: Aravind Mob:9886836592 Date:26/11/2010
Overview of Microsoft Tag
Tag is a high-capacity color barcode (HCCB) with encoded information. Organizations and individuals can create specific Tags by using the Microsoft Tag Manager Web service. When the Microsoft Tag Reader application is installed on a mobile device, the Tag Reader can be used to scan a Tag using the built-in the device camera. When a Tag is scanned by the Tag Reader, the information encoded into the Tag becomes available on the mobile device.
Although Tags are easy to create, how Tags are placed in the field will influence how effective they are in communicating the encoded information to the audience. This guide provides best practices for producing Tags in different types of media. Additionally, it addresses the best practices for testing Tags in the field.
Usage Scenarios
The possibilities for usage and placement of Tags are almost limitless. To give you an idea of what we mean, here are some usage examples for Tags:
An automobile company might want to place a Tag on a billboard as a way to advertise their latest models to potential customers. Passengers and pedestrians could scan the tag as they pass by.
A film production company might put Tags pointing to a movie trailer on a poster at a movie theater, guiding the customer to more extensive information and interviews with the movie stars.
A video game company makes special custom Tags to be used at its trade show booth, allowing gamers to scan the Tag for custom in-game gear or clothing.
A sports drink company might choose to display a series of Tags for a product on the jumbotron in a stadium during a game, providing the fans with a collection of "secret phrases" throughout the game that enable free products or discount coupons.
...and Some Common Challenges
With such freedom of expression comes the need for thoughtful consideration, planning, and implementation of your Tag project. Using the same scenario examples above, let's examine some of the potential implementation challenges you might face:
The automobile company's freeway billboard could be a distraction to motorists who may try to scan the Tag while driving, or something in the environment (such as a light post or large truck) might block a passenger's view.
The film production company's Tags may be obscured by the reflective glare from the poster's glass case under some lighting conditions, making it difficult to scan the Tag.
The video game company's Tag works well in the studio, but the cool blue lighting on the show floor makes the Tag's colors appear all blue, which might impede successful scanning during the trade show.
The sports drink company Tags might become too washed out from the glare from the stadium lights or bright sunshine to scan the tags consistently. Moreover, some fans may be sitting too far away, too close, or at the wrong angle to be able to scan the Tags successfully.
Field Testing
Field testing your Tag in the environment in which users are expected to discover it is an essential component of a successful project or campaign. Developing and field-testing a proof of concept may represent higher overhead, but doing so will save you time and money in the long run.
Tags are very resilient with respect to the color variations of printers as well as to differing camera optics across different manufacturers' phones. Make sure to follow the production recommendations in this guide to ensure that your Tag works on the broadest possible range of mobile devices—this is especially important when using Tags designed with customized images.
Equally important is field-testing your proof-of-concept using a variety of phones, from a variety of manufacturers. Apple iPhone and RIM BlackBerry may have the most robust digital camera support, but not all of your mobile audience can be counted on to be using these devices. Make sure to include a representative sample of low-end, middle-end, and high-end phone models when field-testing your Tags.
Test your Tags under different lighting conditions. Consider the user's distance from the Tag and other possible conditions such as weather, crowds, reflective glare, the background surface of the Tag, and so on.
Mobile device browsers often have different characteristics than desktop browsers have, so it pays to assess how the target content of each Tag displays on a wide variety of mobile device browsers. Verify that any important Web features work, regardless of the browser used. Furthermore, test your Tag content under a variety of conditions per browser; for example, by limiting the display to text-only content, preventing scripts from running, and other conditions.
Keep in mind that video support varies greatly across different mobile platforms and browsers. If your Tag's target content includes a video, we strongly recommend thorough field testing. (In fact, you may want to consider partnering with a mobile video provider who can offer seamless support across different platforms to deliver a great video experience.)
In short, step through your entire user experience with a variety of mobile devices and a variety of manufacturer and third-party mobile browsers, and do so in the places where you expect your audience to discover and use your Tags.
Tag Supporting Content Types
There are four basic content types (URL, free text, vCard, and dialer) that can be linked with Tags. Tags created with the Tag Manager are, by default, a URL Tag that will open a Web site in a mobile browser.
Using Tag Categories
Each Tag you create will be assigned a category by the Tag Manager for tracking and reporting purposes. By default, Tags are assigned to the "Main" category. You aren't required to create new categories, but separating your collection of Tags into categories enables more organized tracking and reporting of your Tag usage. You can create new categories at any time to suit your particular needs. Note that you can also move Tags from one category to another, except when the destination category was created after the Tag itself. For this reason, you may want to create your categories before you begin to create your Tags. For more information, see the Categories tab on the home page of the Tag Manager.
URL: http://tag.microsoft.com/ManageAds.aspx
Creating a URL Tag
This type of Tag opens the mobile device browser, and displays the Web site of your product or campaign.
To create a URL Tag:
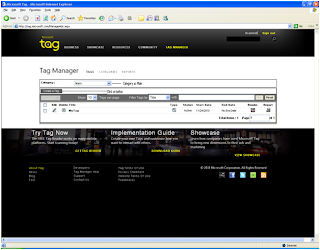
Open the Tag Manager.
Designate the category for the Tag using the Category drop-down menu.
Click Create a Tag.
Type a unique name for the Tag in the Tag Title box. This name can be up to 50 alphanumeric characters long.
Select URL as the Tag Type.
The Tag Notes field is an optional field. This field is limited to 200 alphanumeric characters.
Specify the Start Date for your Tag. The Start Date is the date that scanning the tag will launch the designated action. By default, the Start Date is the date a Tag is created.
Specify an End Date for your Tag, or select No End Date. By default, Tags are not assigned an end date. Note: The Start and End dates of a Tag must fall within the date range specified for the category to which the Tag is assigned.
Type the target URL in the URL text box.
Click Save. The URL Tag is listed in the Manage Existing Tags table of the category you designated.
To clear your changes and revert Tag data back to the default values, click Reset.
Creating a Free Text Tag
Using this Tag, you can send customers a free text message promoting your product, service, or campaign.
To create a free text Tag:
Open the Tag Manager.
Designate the category for the Tag using the Category drop-down menu.
Click Create a Tag.
Type a unique name for the Tag in the Tag Title box. This name can be up to 50 alphanumeric characters long.
Select Free Text as the Tag Type.
The Tag Notes field is an optional field. This field is limited to 200 alphanumeric characters.
Specify the Start Date for your Tag. The Start Date is the date that scanning the tag will launch the designated action. By default, the Start Date is the date a Tag is created.
Specify an End Date for your Tag, or select No End Date. By default, Tags are not assigned an end date.
Type the message you want to convey in the Free Text text box. This field is limited to 1000 characters.
Require a password to access read the message encoded into a Free Text Tag. Using a password to restrict access to the message encoded in a Tag is optional. Passwords can include as many as 20 characters.
To protect the Tag content with a password
At the Protect with Password field, select the Yes check box
Enter the password.
To see the password, select the Show Password check box.
Click Save. The Tag is listed in the Manage Existing Tags table of the category you designated.
To clear your changes and revert the Tag back to the default values, click Reset.
To create a vCard Tag:
Open the Tag Manager.
Designate the category for the Tag using the Category drop-down menu.
Click Create a Tag.
Type a unique name for the Tag in the Tag Title box. This name can be up to 50 alphanumeric characters long.
Select vCard as the Tag Type.
The Tag Notes field is an optional field. This field is limited to 200 alphanumeric characters.
Specify the Start Date for your Tag. The Start Date is the date that scanning the tag will launch the designated action. By default, the Start Date is the date a Tag is created.
Specify an End Date for your Tag, or select No End Date. By default, Tags are not assigned an end date.
Note: The Start and End dates of a Tag must fall within the date range specified for the category to which the Tag is assigned.
At vCard Type, choose From File to upload contact information, or choose Specify Detail to enter the contact information.
To upload contact information from a file
Click Browse...,.
Select the vCard file that contains the appropriate contact information.
To specify contact information using Tag Manager
Select Specify Detail to manually enter the details to include in the contact information encoded into the Tag. The following table shows the available contact fields. Text Box Description
First Name Your first name
Last Name Your last name
Job Title Your job title
Department The name of the department in which you work
Company The name of your company
Web Site The Web site address of your company
E-Mail Your e-mail address
IM Address Your instant messaging address
Work Phone Your work phone number
Home Phone Your home phone number
Mobile Your cell phone (or mobile phone) number
Fax Your fax number
Street The street address where your company is located
City The city in which your company is located
State The state in which your company is located
Zip/Postal code The zip or postal code of your company
Country The country in which your company is located
Dial a Phone Number—Creating a Dialer Tag
When scanned with the Tag Reader, a Dialer Tag initiates a call to the phone number specified in the Tag.
To create a Dialer Tag:
Open the Tag Manager.
Designate the category for the Tag using the Category drop-down menu.
Click Create a Tag.
Type a unique name for the Tag in the Tag Title box. This name can be up to 50 alphanumeric characters long.
Select Free Text as the Tag Type.
The Tag Notes field is an optional field. This field is limited to 200 alphanumeric characters.
Specify the Start Date for your Tag. The Start Date is the date that scanning the tag will launch the designated action. By default, the Start Date is the date a Tag is created.
Specify an End Date for your Tag, or select No End Date. By default, Tags are not assigned an end date.
In the Phone Number text box, enter the number to dial.
To protect the Tag content with a password
At the Protect with Password field, select the Yes check box
Enter the password. To see the password, select the Show Password check box
To see the password, select the Show Password check box.
Click Save. The Tag is listed in the Manage Existing Tags table of the category you designated.
To clear your changes and revert the Tag back to the default values, click Reset.
Creating Custom Tag Images
To provide a wide variety of branding and creative opportunities, Tags are customizable. You can modify how a Tag looks to suit your individual and business goals.
To create a custom Tag image:
Sign-in to the Tag Manager.
Create a basic Tag.
Select the Tag to customize from the Manage Existing Tags table.
Click the Tag icon in the Render column of the table.
In the Render dialog box, use the File Type drop-down menu to select wmf.
Note Microsoft Tag only supports custom Tags for WMF and PDF files. Microsoft PowerPoint® does not support PDF files.
Specify the size of the Tag as equal to or larger than 1.25";
Select Custom.
Click Render.
Save the rendered Tag.
Replace the Background Image
Once you've created and saved a custom Tag, you're ready to add your own background. Here are steps for using Microsoft PowerPoint® or Adobe Illustrator to customize the background of your Tag.
To add a background image with PowerPoint:
Launch PowerPoint.
Create a new presentation.
Click the Insert tab in the ribbon.
In the Images group, click Picture.
Browse to and select the background image you want to use with your Tag, and then click Insert.
Click the Insert tab in the ribbon again.
In the Images group, click Picture.
Browse to and select the custom Tag image file, and then click Insert.
Right-click the custom Tag image.
On the shortcut menu, click Bring to Front.
Resize, crop, and position the background and custom Tag image so that the background fits inside the Tag area. Make sure to maintain the white space around the perimeter of the Tag. For more information, see About Tag Borders.
Draw a box around the images to select both of them, as shown:
With both images selected, click the Format tab in the ribbon.
In the Arrange group, click Group.
In the drop-down menu, click Group.
With the grouped image still selected, right-click the image.
On the shortcut menu, click Save as Picture.
Name the image and save it as a .jpg, .gif, .png, or .wmf file.
To add a background image with Adobe Illustrator:
Start Adobe Illustrator and open the Tag image.
Rename Layer 1 to "Tag."
Create a new layer for the background image and name it "Background."
Drag the Background layer so that it is beneath the Tag layer, and then lock the Tag layer.
Click the Background layer bar to make Background the active layer.
On the File menu, click Place.
Select the image you want to use as the background image, and then click Place.
Resize, crop, and position the background and custom Tag image as needed to make the background fit inside the Tag area. Make sure to maintain the white space around the perimeter of the Tag. (For more information, see "About Tag Borders.")
Save the Illustrator file.
Save the Tag as a file:
On the File menu, click Export to save the Tag in .jpg, .gif, .png, or other image format.
On the File menu, click Save As to save the Tag in .pdf or other file format.
Created By: Aravind Mob:9886836592 Date:26/11/2010
Overview of Microsoft Tag
Tag is a high-capacity color barcode (HCCB) with encoded information. Organizations and individuals can create specific Tags by using the Microsoft Tag Manager Web service. When the Microsoft Tag Reader application is installed on a mobile device, the Tag Reader can be used to scan a Tag using the built-in the device camera. When a Tag is scanned by the Tag Reader, the information encoded into the Tag becomes available on the mobile device.
Although Tags are easy to create, how Tags are placed in the field will influence how effective they are in communicating the encoded information to the audience. This guide provides best practices for producing Tags in different types of media. Additionally, it addresses the best practices for testing Tags in the field.
Usage Scenarios
The possibilities for usage and placement of Tags are almost limitless. To give you an idea of what we mean, here are some usage examples for Tags:
An automobile company might want to place a Tag on a billboard as a way to advertise their latest models to potential customers. Passengers and pedestrians could scan the tag as they pass by.
A film production company might put Tags pointing to a movie trailer on a poster at a movie theater, guiding the customer to more extensive information and interviews with the movie stars.
A video game company makes special custom Tags to be used at its trade show booth, allowing gamers to scan the Tag for custom in-game gear or clothing.
A sports drink company might choose to display a series of Tags for a product on the jumbotron in a stadium during a game, providing the fans with a collection of "secret phrases" throughout the game that enable free products or discount coupons.
...and Some Common Challenges
With such freedom of expression comes the need for thoughtful consideration, planning, and implementation of your Tag project. Using the same scenario examples above, let's examine some of the potential implementation challenges you might face:
The automobile company's freeway billboard could be a distraction to motorists who may try to scan the Tag while driving, or something in the environment (such as a light post or large truck) might block a passenger's view.
The film production company's Tags may be obscured by the reflective glare from the poster's glass case under some lighting conditions, making it difficult to scan the Tag.
The video game company's Tag works well in the studio, but the cool blue lighting on the show floor makes the Tag's colors appear all blue, which might impede successful scanning during the trade show.
The sports drink company Tags might become too washed out from the glare from the stadium lights or bright sunshine to scan the tags consistently. Moreover, some fans may be sitting too far away, too close, or at the wrong angle to be able to scan the Tags successfully.
Field Testing
Field testing your Tag in the environment in which users are expected to discover it is an essential component of a successful project or campaign. Developing and field-testing a proof of concept may represent higher overhead, but doing so will save you time and money in the long run.
Tags are very resilient with respect to the color variations of printers as well as to differing camera optics across different manufacturers' phones. Make sure to follow the production recommendations in this guide to ensure that your Tag works on the broadest possible range of mobile devices—this is especially important when using Tags designed with customized images.
Equally important is field-testing your proof-of-concept using a variety of phones, from a variety of manufacturers. Apple iPhone and RIM BlackBerry may have the most robust digital camera support, but not all of your mobile audience can be counted on to be using these devices. Make sure to include a representative sample of low-end, middle-end, and high-end phone models when field-testing your Tags.
Test your Tags under different lighting conditions. Consider the user's distance from the Tag and other possible conditions such as weather, crowds, reflective glare, the background surface of the Tag, and so on.
Mobile device browsers often have different characteristics than desktop browsers have, so it pays to assess how the target content of each Tag displays on a wide variety of mobile device browsers. Verify that any important Web features work, regardless of the browser used. Furthermore, test your Tag content under a variety of conditions per browser; for example, by limiting the display to text-only content, preventing scripts from running, and other conditions.
Keep in mind that video support varies greatly across different mobile platforms and browsers. If your Tag's target content includes a video, we strongly recommend thorough field testing. (In fact, you may want to consider partnering with a mobile video provider who can offer seamless support across different platforms to deliver a great video experience.)
In short, step through your entire user experience with a variety of mobile devices and a variety of manufacturer and third-party mobile browsers, and do so in the places where you expect your audience to discover and use your Tags.
Tag Supporting Content Types
There are four basic content types (URL, free text, vCard, and dialer) that can be linked with Tags. Tags created with the Tag Manager are, by default, a URL Tag that will open a Web site in a mobile browser.
Using Tag Categories
Each Tag you create will be assigned a category by the Tag Manager for tracking and reporting purposes. By default, Tags are assigned to the "Main" category. You aren't required to create new categories, but separating your collection of Tags into categories enables more organized tracking and reporting of your Tag usage. You can create new categories at any time to suit your particular needs. Note that you can also move Tags from one category to another, except when the destination category was created after the Tag itself. For this reason, you may want to create your categories before you begin to create your Tags. For more information, see the Categories tab on the home page of the Tag Manager.
URL: http://tag.microsoft.com/ManageAds.aspx

Creating a URL Tag
This type of Tag opens the mobile device browser, and displays the Web site of your product or campaign.
To create a URL Tag:
Open the Tag Manager.
Designate the category for the Tag using the Category drop-down menu.
Click Create a Tag.
Type a unique name for the Tag in the Tag Title box. This name can be up to 50 alphanumeric characters long.
Select URL as the Tag Type.
The Tag Notes field is an optional field. This field is limited to 200 alphanumeric characters.
Specify the Start Date for your Tag. The Start Date is the date that scanning the tag will launch the designated action. By default, the Start Date is the date a Tag is created.
Specify an End Date for your Tag, or select No End Date. By default, Tags are not assigned an end date. Note: The Start and End dates of a Tag must fall within the date range specified for the category to which the Tag is assigned.
Type the target URL in the URL text box.
Click Save. The URL Tag is listed in the Manage Existing Tags table of the category you designated.
To clear your changes and revert Tag data back to the default values, click Reset.
Creating a Free Text Tag
Using this Tag, you can send customers a free text message promoting your product, service, or campaign.
To create a free text Tag:
Open the Tag Manager.
Designate the category for the Tag using the Category drop-down menu.
Click Create a Tag.
Type a unique name for the Tag in the Tag Title box. This name can be up to 50 alphanumeric characters long.
Select Free Text as the Tag Type.
The Tag Notes field is an optional field. This field is limited to 200 alphanumeric characters.
Specify the Start Date for your Tag. The Start Date is the date that scanning the tag will launch the designated action. By default, the Start Date is the date a Tag is created.
Specify an End Date for your Tag, or select No End Date. By default, Tags are not assigned an end date.
Type the message you want to convey in the Free Text text box. This field is limited to 1000 characters.
Require a password to access read the message encoded into a Free Text Tag. Using a password to restrict access to the message encoded in a Tag is optional. Passwords can include as many as 20 characters.
To protect the Tag content with a password
At the Protect with Password field, select the Yes check box
Enter the password.
To see the password, select the Show Password check box.
Click Save. The Tag is listed in the Manage Existing Tags table of the category you designated.
To clear your changes and revert the Tag back to the default values, click Reset.
To create a vCard Tag:
Open the Tag Manager.
Designate the category for the Tag using the Category drop-down menu.
Click Create a Tag.
Type a unique name for the Tag in the Tag Title box. This name can be up to 50 alphanumeric characters long.
Select vCard as the Tag Type.
The Tag Notes field is an optional field. This field is limited to 200 alphanumeric characters.
Specify the Start Date for your Tag. The Start Date is the date that scanning the tag will launch the designated action. By default, the Start Date is the date a Tag is created.
Specify an End Date for your Tag, or select No End Date. By default, Tags are not assigned an end date.
Note: The Start and End dates of a Tag must fall within the date range specified for the category to which the Tag is assigned.
At vCard Type, choose From File to upload contact information, or choose Specify Detail to enter the contact information.
To upload contact information from a file
Click Browse...,.
Select the vCard file that contains the appropriate contact information.
To specify contact information using Tag Manager
Select Specify Detail to manually enter the details to include in the contact information encoded into the Tag. The following table shows the available contact fields. Text Box Description
First Name Your first name
Last Name Your last name
Job Title Your job title
Department The name of the department in which you work
Company The name of your company
Web Site The Web site address of your company
E-Mail Your e-mail address
IM Address Your instant messaging address
Work Phone Your work phone number
Home Phone Your home phone number
Mobile Your cell phone (or mobile phone) number
Fax Your fax number
Street The street address where your company is located
City The city in which your company is located
State The state in which your company is located
Zip/Postal code The zip or postal code of your company
Country The country in which your company is located
Dial a Phone Number—Creating a Dialer Tag
When scanned with the Tag Reader, a Dialer Tag initiates a call to the phone number specified in the Tag.
To create a Dialer Tag:
Open the Tag Manager.
Designate the category for the Tag using the Category drop-down menu.
Click Create a Tag.
Type a unique name for the Tag in the Tag Title box. This name can be up to 50 alphanumeric characters long.
Select Free Text as the Tag Type.
The Tag Notes field is an optional field. This field is limited to 200 alphanumeric characters.
Specify the Start Date for your Tag. The Start Date is the date that scanning the tag will launch the designated action. By default, the Start Date is the date a Tag is created.
Specify an End Date for your Tag, or select No End Date. By default, Tags are not assigned an end date.
In the Phone Number text box, enter the number to dial.
To protect the Tag content with a password
At the Protect with Password field, select the Yes check box
Enter the password. To see the password, select the Show Password check box
To see the password, select the Show Password check box.
Click Save. The Tag is listed in the Manage Existing Tags table of the category you designated.
To clear your changes and revert the Tag back to the default values, click Reset.
Creating Custom Tag Images
To provide a wide variety of branding and creative opportunities, Tags are customizable. You can modify how a Tag looks to suit your individual and business goals.
To create a custom Tag image:
Sign-in to the Tag Manager.
Create a basic Tag.
Select the Tag to customize from the Manage Existing Tags table.
Click the Tag icon in the Render column of the table.
In the Render dialog box, use the File Type drop-down menu to select wmf.
Note Microsoft Tag only supports custom Tags for WMF and PDF files. Microsoft PowerPoint® does not support PDF files.
Specify the size of the Tag as equal to or larger than 1.25";
Select Custom.
Click Render.
Save the rendered Tag.
Replace the Background Image
Once you've created and saved a custom Tag, you're ready to add your own background. Here are steps for using Microsoft PowerPoint® or Adobe Illustrator to customize the background of your Tag.
To add a background image with PowerPoint:
Launch PowerPoint.
Create a new presentation.
Click the Insert tab in the ribbon.
In the Images group, click Picture.
Browse to and select the background image you want to use with your Tag, and then click Insert.
Click the Insert tab in the ribbon again.
In the Images group, click Picture.
Browse to and select the custom Tag image file, and then click Insert.
Right-click the custom Tag image.
On the shortcut menu, click Bring to Front.
Resize, crop, and position the background and custom Tag image so that the background fits inside the Tag area. Make sure to maintain the white space around the perimeter of the Tag. For more information, see About Tag Borders.
Draw a box around the images to select both of them, as shown:
With both images selected, click the Format tab in the ribbon.
In the Arrange group, click Group.
In the drop-down menu, click Group.
With the grouped image still selected, right-click the image.
On the shortcut menu, click Save as Picture.
Name the image and save it as a .jpg, .gif, .png, or .wmf file.
To add a background image with Adobe Illustrator:
Start Adobe Illustrator and open the Tag image.
Rename Layer 1 to "Tag."
Create a new layer for the background image and name it "Background."
Drag the Background layer so that it is beneath the Tag layer, and then lock the Tag layer.
Click the Background layer bar to make Background the active layer.
On the File menu, click Place.
Select the image you want to use as the background image, and then click Place.
Resize, crop, and position the background and custom Tag image as needed to make the background fit inside the Tag area. Make sure to maintain the white space around the perimeter of the Tag. (For more information, see "About Tag Borders.")
Save the Illustrator file.
Save the Tag as a file:
On the File menu, click Export to save the Tag in .jpg, .gif, .png, or other image format.
On the File menu, click Save As to save the Tag in .pdf or other file format.

Comments
Post a Comment